

The time has come to upgrade your home’s lighting by replacing traditional incandescent bulbs with energy-efficient LED bulbs. Vintage light fixtures, known for their retro aesthetics, can greatly benefit from this upgrade, merging classic design with modern technology. LED bulbs not only reduce energy consumption but also enhance the overall ambiance of your space while maintaining the nostalgic charm that vintage fixtures provide.
Transforming your lighting setup involves more than just aesthetics; it’s about creating an environment that combines retro flair with cutting-edge efficiency. However, installing LED bulbs in vintage fixtures can be a nuanced process, as many vintage designs were not initially intended to accommodate the specifics of modern bulb technology. This article will guide you step-by-step through the installation process, ensuring you can enjoy the benefits of LED lighting without compromising the unique character of your beloved retro fixtures.
Choosing the Right Retro LED Bulbs for Your Vintage Fixtures
When selecting retro LED bulbs for your vintage light fixtures, it’s essential to consider several factors to ensure the perfect match in both aesthetics and functionality. Firstly, look for bulbs that offer a warm color temperature, typically between 2200K and 2700K. This range mimics the soft glow of traditional incandescent bulbs, enhancing the vintage look while providing modern energy efficiency.
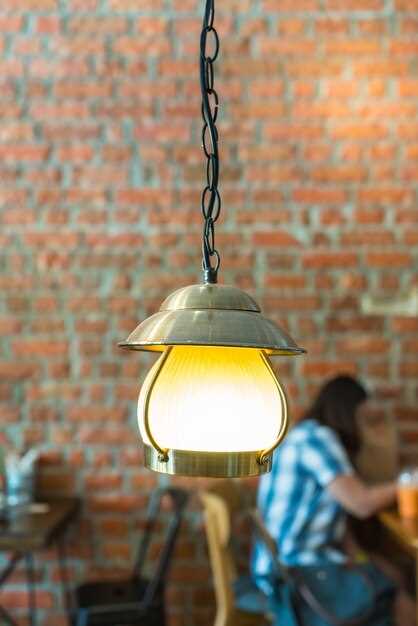
Next, consider the shape and size of the bulbs. Classic options like Edison-style or globe bulbs can add charm to your lighting setup, while maintaining their compatibility with the fixture. Make sure to check the dimensions to guarantee a snug fit in your vintage designs.
Additionally, pay attention to the brightness of the LEDs. Measured in lumens, you’ll want to choose a brightness level that complements your space without overwhelming it. For cozy areas, bulbs in the range of 400 to 800 lumens can create the desired ambiance without sacrificing the nostalgic feel.
Another important factor is the dimming capability. If your vintage fixtures support dimmer switches, opt for LED bulbs labeled as dimmable. This feature allows you to control the lighting intensity, enhancing both the atmosphere and energy efficiency.
Lastly, confirm the quality of the LED bulbs by checking for reliable brands known for their retro offerings. Look for options that boast a high CRI (Color Rendering Index), ensuring that colors appear vibrant and true to life under your vintage lighting. By thoughtfully considering these elements, you can successfully choose retro LEDs that elevate your vintage fixtures while enjoying the benefits of modern lighting technology.
Step-by-Step Guide to Installing LED Bulbs in Antique Lighting
Upgrading your vintage light fixtures with LED bulbs can significantly enhance both their efficiency and longevity. Follow these steps to ensure a seamless transition from traditional bulbs to modern LED lighting in your retro setups.
1. Choose the Right LED Bulb: Start by selecting LED bulbs that complement your antique fixtures. Look for bulbs with a warm color temperature, typically between 2700K and 3000K, to maintain the cozy ambiance associated with vintage lighting. Ensure the wattage is equivalent to or lower than the original bulbs to avoid overheating.
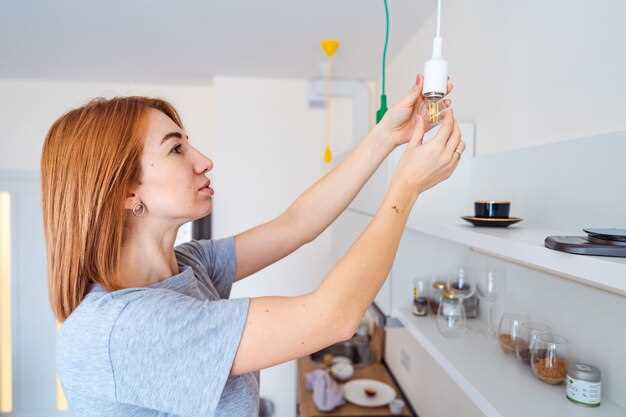
2. Turn Off Power: Before you begin the installation, make sure to turn off the power to the light fixture at the circuit breaker. This is a crucial safety step to prevent any electrical mishaps while you handle the fixture.
3. Remove Existing Bulbs: Carefully unscrew and remove the old incandescent or halogen bulbs from your antique lighting fixture. If the bulbs are tightly secured, use a cloth for grip, but avoid applying excessive force to prevent damage to the fixture.
4. Inspect the Fixture: Examine the socket and wiring for any signs of damage or wear. Due to the age of vintage fixtures, it’s important to ensure they are in good condition before proceeding. If any issues are identified, consider consulting an electrician for repairs.
5. Insert LED Bulbs: Take your chosen LED bulbs and gently screw them into the sockets of the fixture. Ensure they are securely fitted but do not overtighten, as this may harm the socket.
6. Restore Power: Once the LED bulbs are installed, return to the circuit breaker and turn the power back on. This step reinstates the electricity and allows you to test the functionality of your retro light fixture.
7. Test the Lights: Switch on the fixture to confirm that the LED bulbs illuminate properly. Observe for any flickering or unusual behavior, which may indicate an incompatible bulb or a need for further electrical checks.
8. Enjoy Your Upgraded Antique Lighting: With the installation complete, step back and appreciate the enhanced lighting. LED bulbs not only provide better energy efficiency but also extend the life of your cherished antique fixtures.
Tips for Maintaining the Aesthetics of Vintage Lighting with LEDs
Upgrading to LED bulbs in vintage light fixtures can significantly enhance energy efficiency while preserving the unique charm of retro designs. Here are some tips to maintain the aesthetics of your vintage lighting when making the switch to LEDs.
First, opt for LED bulbs that closely mimic the warm glow of incandescent bulbs. Look for options labeled as “soft white” or those with a color temperature around 2700K. This will ensure that your lighting retains the cozy ambiance typically associated with vintage fixtures.
Consider choosing vintage-style LED bulbs, often referred to as “Edison” bulbs. These bulbs feature a clear glass design and visible filament that replicate the classic look of traditional incandescent bulbs, making them an ideal choice for retro lighting.
Pay attention to the shape and size of the LEDs you select. Maintaining the dimensions of the original bulbs is crucial to preserving the visual appeal of the fixture. Ensure the new bulbs fit snugly without detracting from the overall design.
Use dimmer switches compatible with LED technology to further enhance the ambiance. Dimming can create a softer light that complements the vintage aesthetic and allows for versatile lighting scenarios.
Lastly, regularly clean both the bulbs and fixtures to keep them free from dust and grime, which can dull the appearance of your decorative elements. This simple maintenance step helps maintain the retro charm while maximizing the visual impact of your new LED upgrade.