

Restoring an antique car is a rewarding yet challenging endeavor that appeals to automotive enthusiasts and history buffs alike. As you embark on this journey, you may encounter various obstacles, with two of the most prevalent issues being engine malfunctions and rust damage. Understanding these common problems and their potential solutions is crucial for a successful restoration project.
An antique car’s engine, often the heart of the vehicle, can present numerous challenges during the restoration process. From outdated technology to parts scarcity, getting an engine to run smoothly may require a combination of ingenuity and skill. Many enthusiasts find themselves faced with the task of rebuilding or refurbishing the engine, which can be daunting but essential for maintaining performance and authenticity.
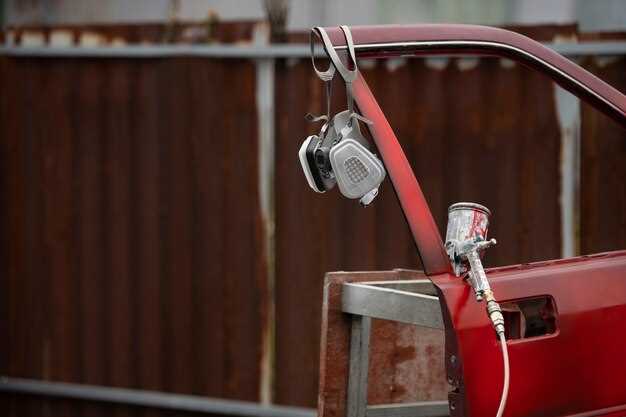
Rust is another significant concern when dealing with vintage vehicles. Over the years, exposure to moisture and the elements can lead to extensive corrosion, compromising both the car’s structural integrity and aesthetic appeal. Addressing rust damage often involves careful assessment and effective treatment methods, ranging from simple patching to complete panel replacements. Recognizing the signs of rust early and employing appropriate strategies can save time and resources in the long run.
Identifying and Treating Rust Issues in Antique Cars
Rust is one of the most common issues faced by antique car restorers. Understanding how to identify and treat rust efficiently can significantly improve the longevity and appearance of these classic vehicles. The process begins with a thorough inspection.
Start by examining the car’s body, especially areas prone to rust accumulation such as wheel wells, undercarriages, and door panels. Look for flaking paint or small bubbles, which often indicate underlying rust. Remember to check the engine compartment as well; moisture can lead to rust on various engine components, affecting both functionality and aesthetic quality.
Once rust is identified, immediate action is required to prevent further damage. Begin by cleaning the affected area with a wire brush or sandpaper to remove loose rust and debris. For deeper rust, you may need to use a rust converter that chemically transforms rust into a stable compound, which can be painted over.
After cleaning, it is essential to apply a high-quality primer to prevent future rust development. Ensure the area is properly sealed before repainting to restore the car’s original allure. In severe cases, replacing entire panels may be necessary if rust has compromised structural integrity.
Preventive maintenance should also be a priority. Regular washing, especially after exposure to road salt or moisture, can help mitigate rust formation. Additionally, consider applying a protective wax or sealant to the paint finish to provide an extra layer of defense against rust.
Addressing rust issues promptly ensures that antique cars retain their value and charm, enabling enthusiasts to enjoy their vehicles for years to come. Staying vigilant and proactive about rust management is key to successful antique car restoration.
Steps for a Successful Engine Rebuild in Classic Vehicles
One of the most critical aspects of restoring an antique vehicle is the engine rebuild. Proper planning and execution can lead to a reliable and powerful engine, enhancing the overall performance and longevity of your classic car.
1. Assess the Condition
Start by evaluating the engine for signs of wear and rust. Look for oil leaks, unusual noises, and performance issues. Determine whether a full rebuild is necessary or if repairs can be sufficient.
2. Disassemble the Engine
Carefully remove the engine from the vehicle and disassemble it, documenting each step for reference. Keep track of all parts and fasteners, as reassembly will require meticulous attention to detail.
3. Clean All Components
Thoroughly clean each component to remove dirt, rust, and old oil. Use appropriate cleaning agents and methods, such as chemical solvents or ultrasonic cleaners, to restore metal surfaces.
4. Inspect Each Part
Closely examine each part for damage or excessive wear. Components like the crankshaft, camshaft, and cylinder heads should be checked for cracks and appropriate tolerances. Replace any parts that don’t meet specifications.
5. Machine Work
Take components that need resurfacing or machining to a reputable machine shop. This includes cylinder boring, crankshaft grinding, and head resurfacing, which are essential for a proper fit and function.
6. Replace Seals and Gaskets
Install high-quality seals and gaskets to prevent leaks after reassembly. This step is vital for ensuring the longevity of the rebuild and maintaining optimal engine performance.
7. Reassemble the Engine
Follow your documentation closely to reassemble the engine. Pay careful attention to the torque specifications for bolts and the placement of all components. A methodical approach will help avoid mistakes.
8. Break-in Period
Once reassembled, the engine requires a break-in period. Monitor oil pressure and temperature closely during this time, allowing the engine to settle and components to adapt to one another.
9. Regular Maintenance
Post-rebuild, maintain a regular service schedule to ensure the engine continues to run smoothly. Consistent oil changes and inspections can prevent future issues and extend the life of your classic vehicle.
By following these steps, you can achieve a successful engine rebuild that enhances the performance and durability of your classic vehicle, while preserving its unique heritage.
Common Electrical Problems and Their Remedies in Vintage Cars
Vintage cars often exhibit various electrical issues due to age, wear, and environmental factors such as rust. Understanding these common problems and their remedies can facilitate a successful restoration project.
One prevalent issue is faulty wiring caused by deterioration over time. Insulation can degrade, leading to shorts or open circuits. To remedy this, carefully inspect all wiring harnesses for signs of damage. Rebuild any compromised segments using high-quality replacement wire and connectors that meet original specifications. This will enhance reliability and safety.
Another common problem relates to corroded electrical connections. Rust can accumulate on terminals and connectors, impeding electrical flow. Cleaning corroded connections with a wire brush or appropriate chemical cleaner can restore functionality. For persistent issues, consider replacing corroded components entirely, ensuring that all connections are tight and secure to prevent future problems.
Additionally, vintage vehicles frequently struggle with outdated ignition systems. Faulty distributors, points, or coils can lead to starting difficulties or poor performance. Upgrading the ignition system to a more modern equivalent or rebuilding the existing unit with new components can significantly improve reliability. Ensure that all connections are clean and free from rust to achieve optimal performance.
Battery issues are also common in vintage cars. Old batteries may lose their ability to hold a charge, or connections may corrode over time. Regularly check the battery condition and terminals for rust. Rebuild or replace connections when needed, and consider upgrading to a new battery that meets the specific requirements of the vintage model for improved performance.
Lastly, lighting problems, including dim headlights or malfunctioning dashboard lights, are frequent in older cars. This can often be traced back to weak grounds or faulty switches. Inspect the ground connections and ensure that they are free from rust. Rebuilding these connections can enhance the performance of the vehicle’s lighting system.